

Create Reducto API Key
1
Open Studio
Go to studio.reducto.ai and sign in. From the home page, click API Keys in the left sidebar.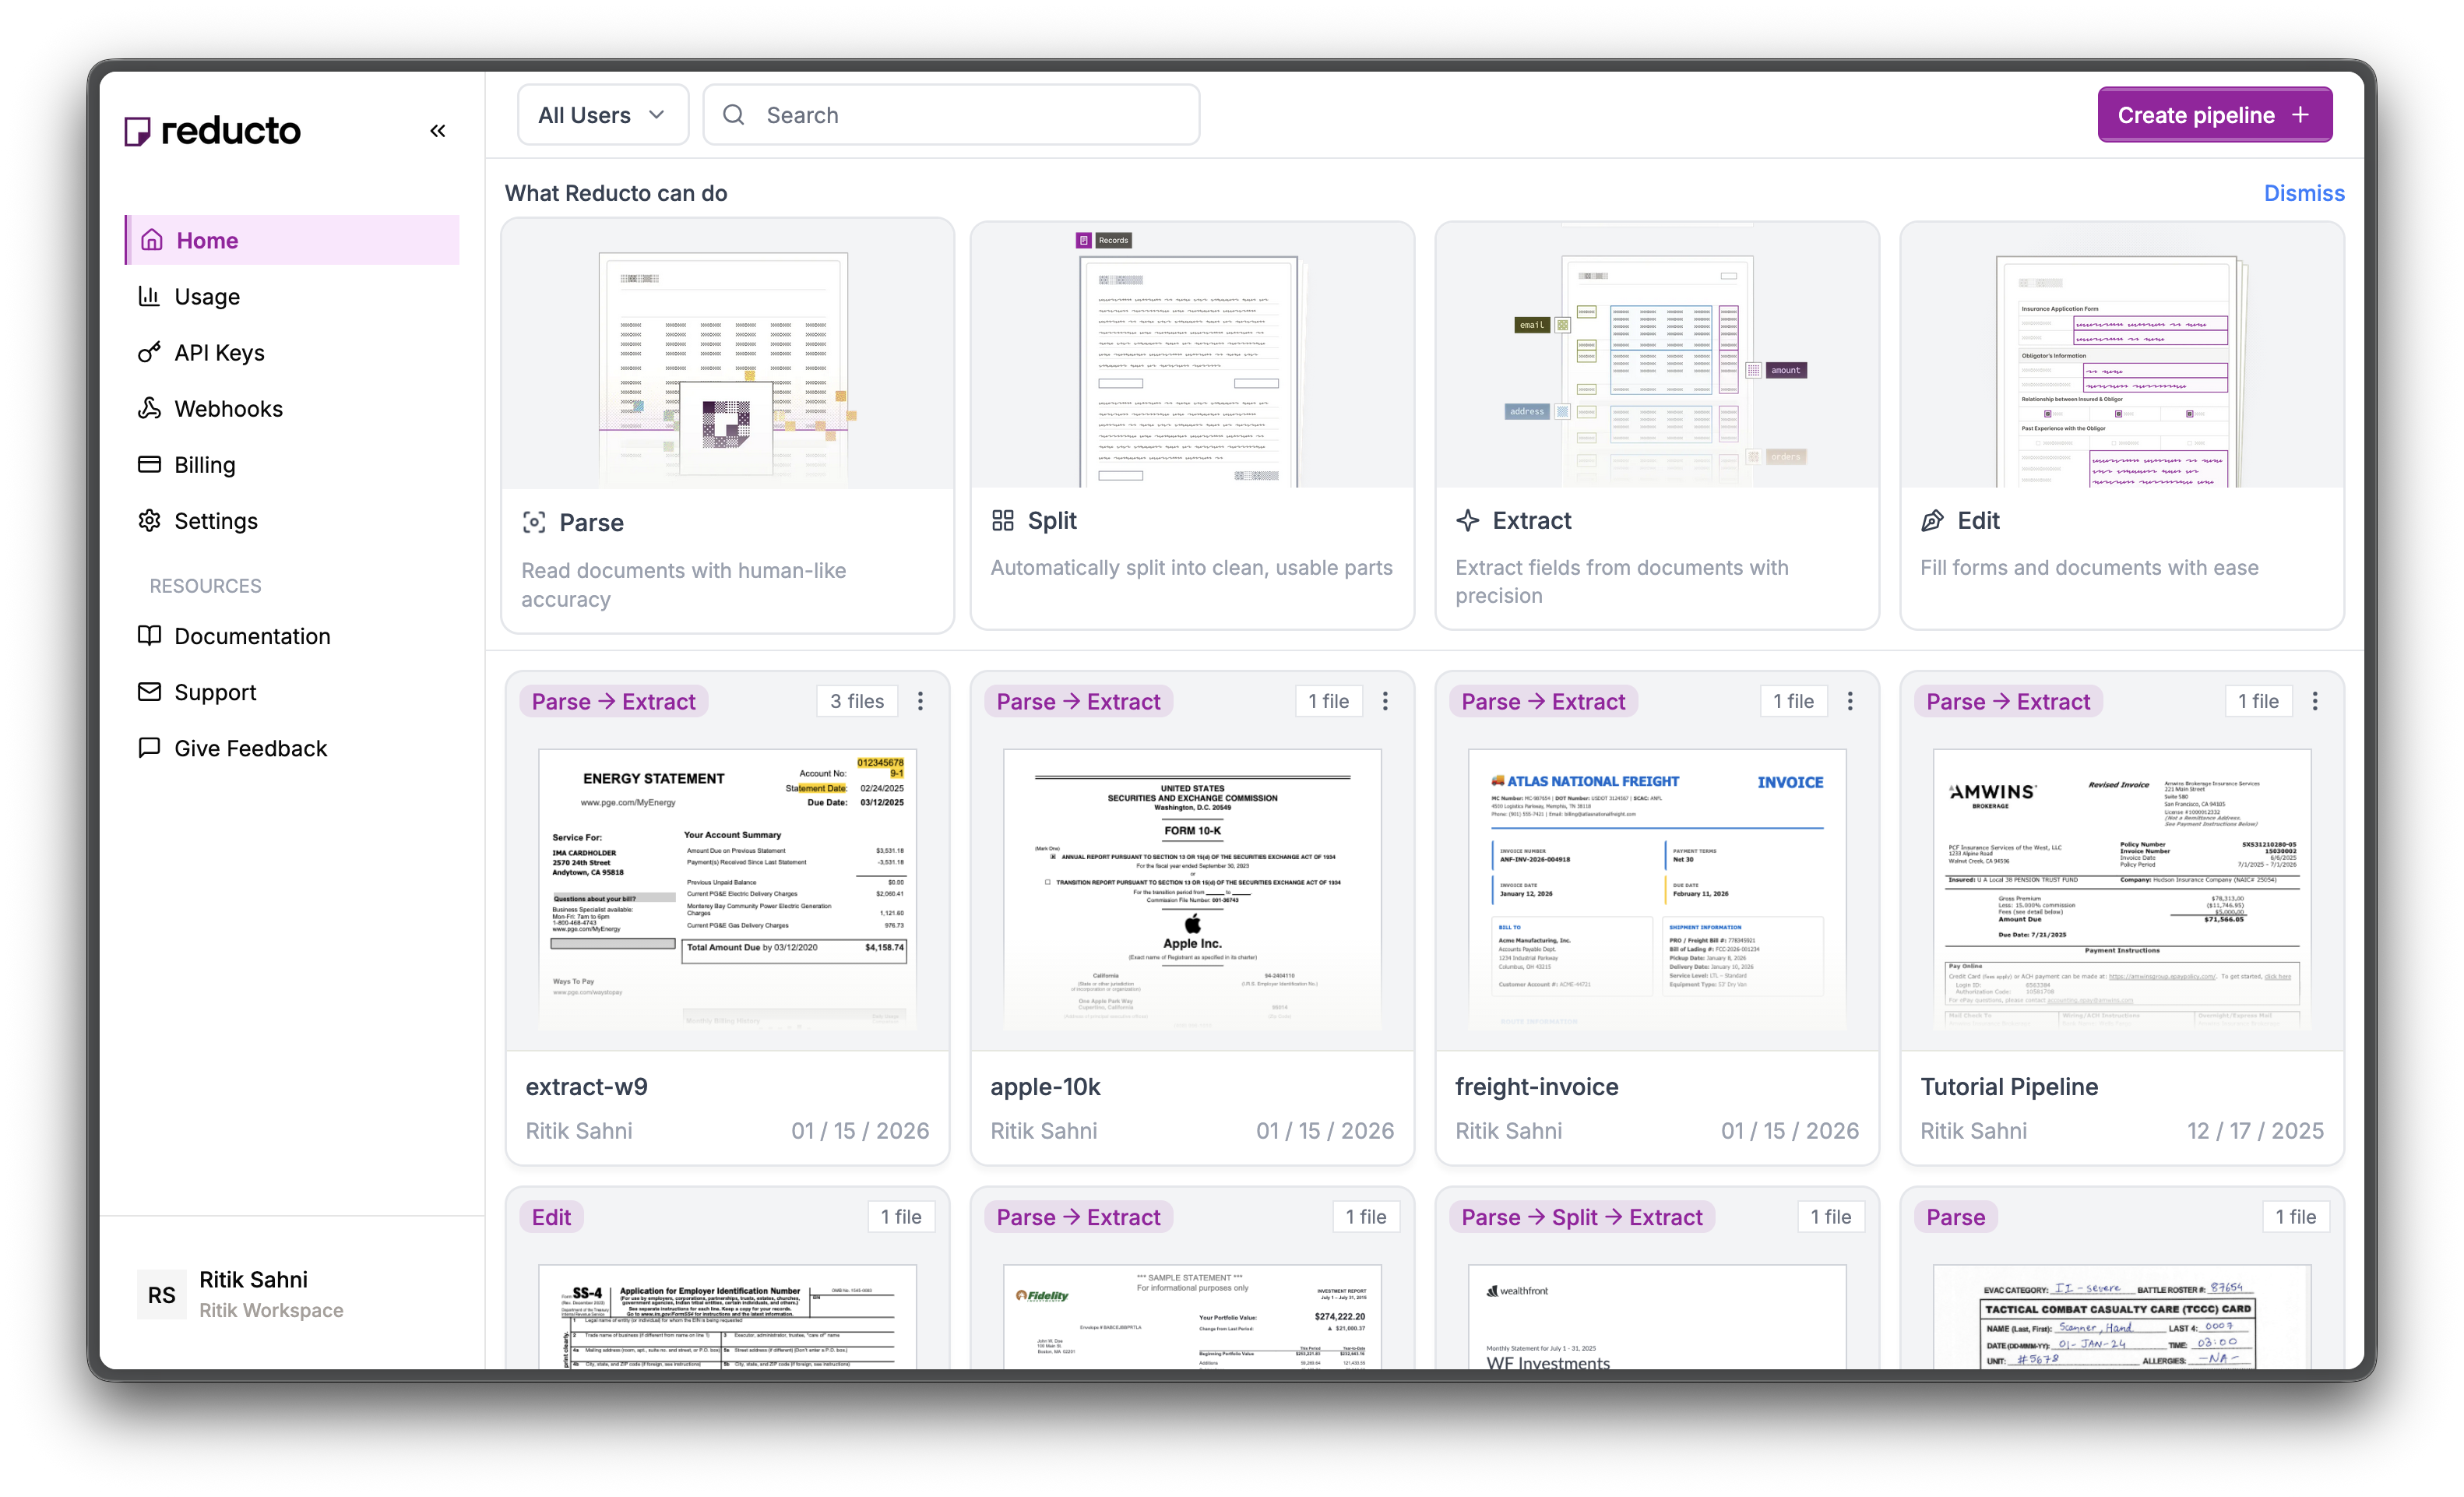
2
View API Keys
The API Keys page shows your existing keys. Click Create API Key in the top right corner.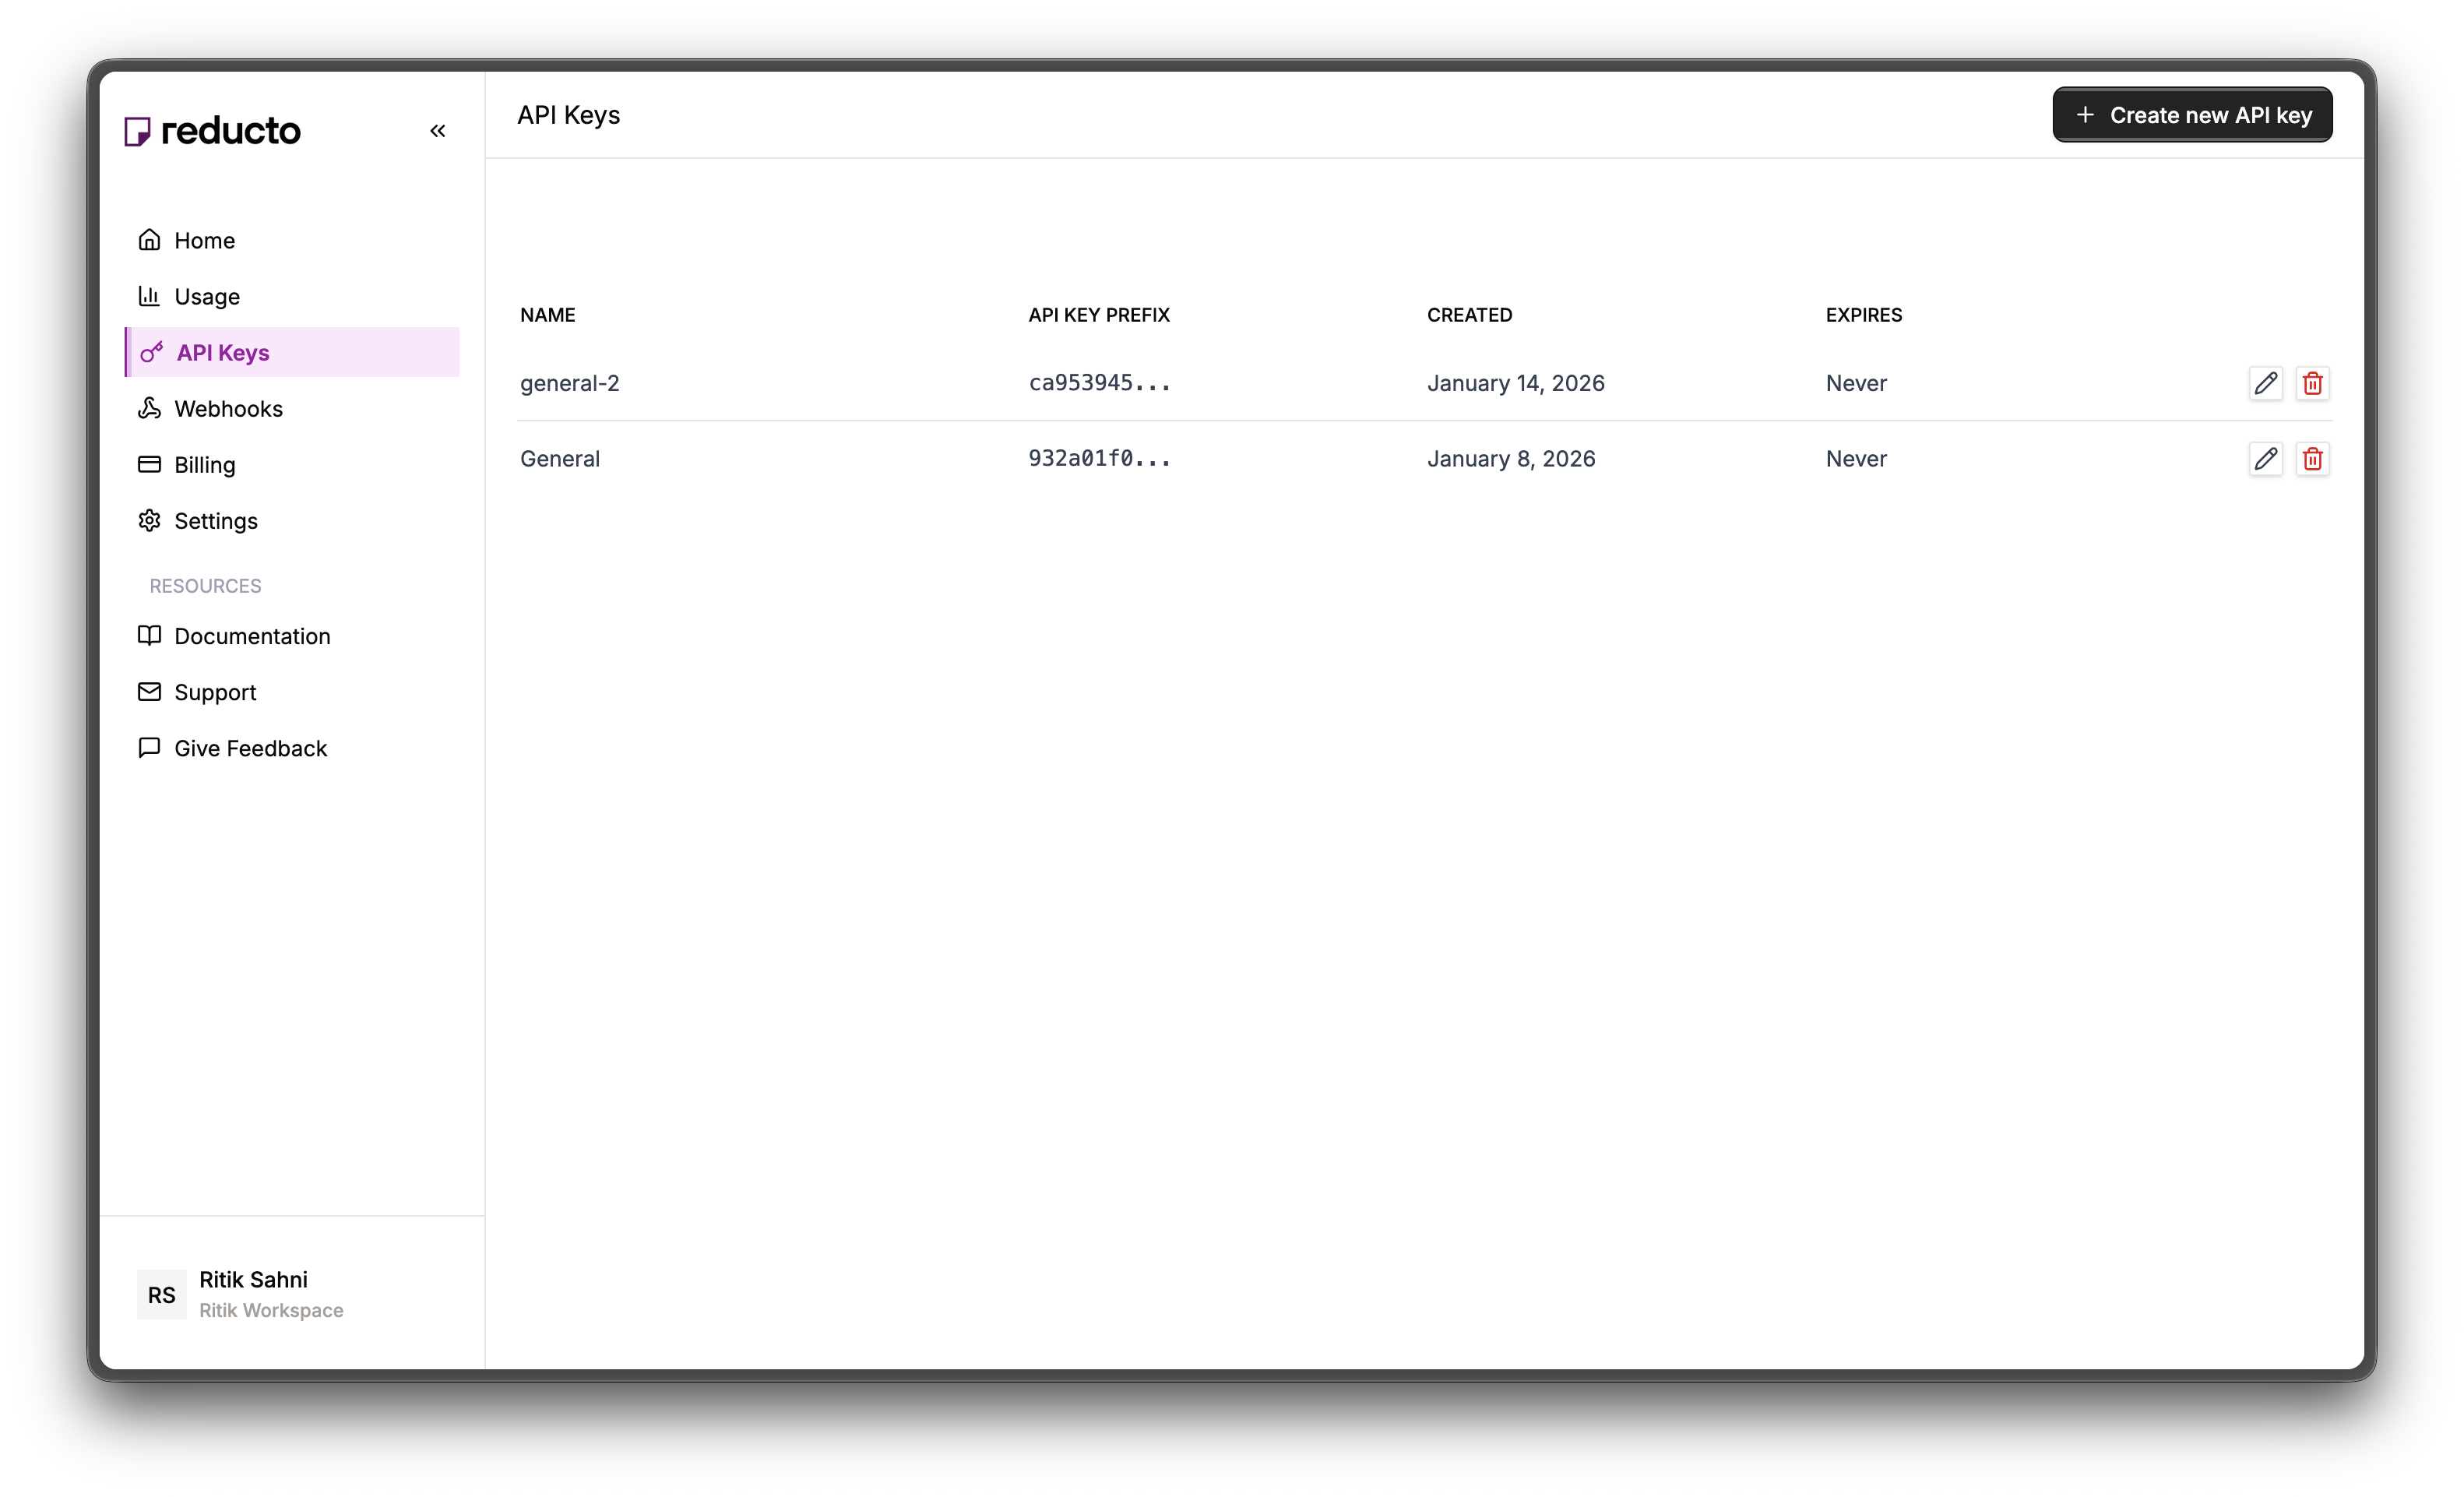
3
Configure Key
In the modal, enter a name for your key and set an expiration policy (or select “Never” for no expiration). Click Create.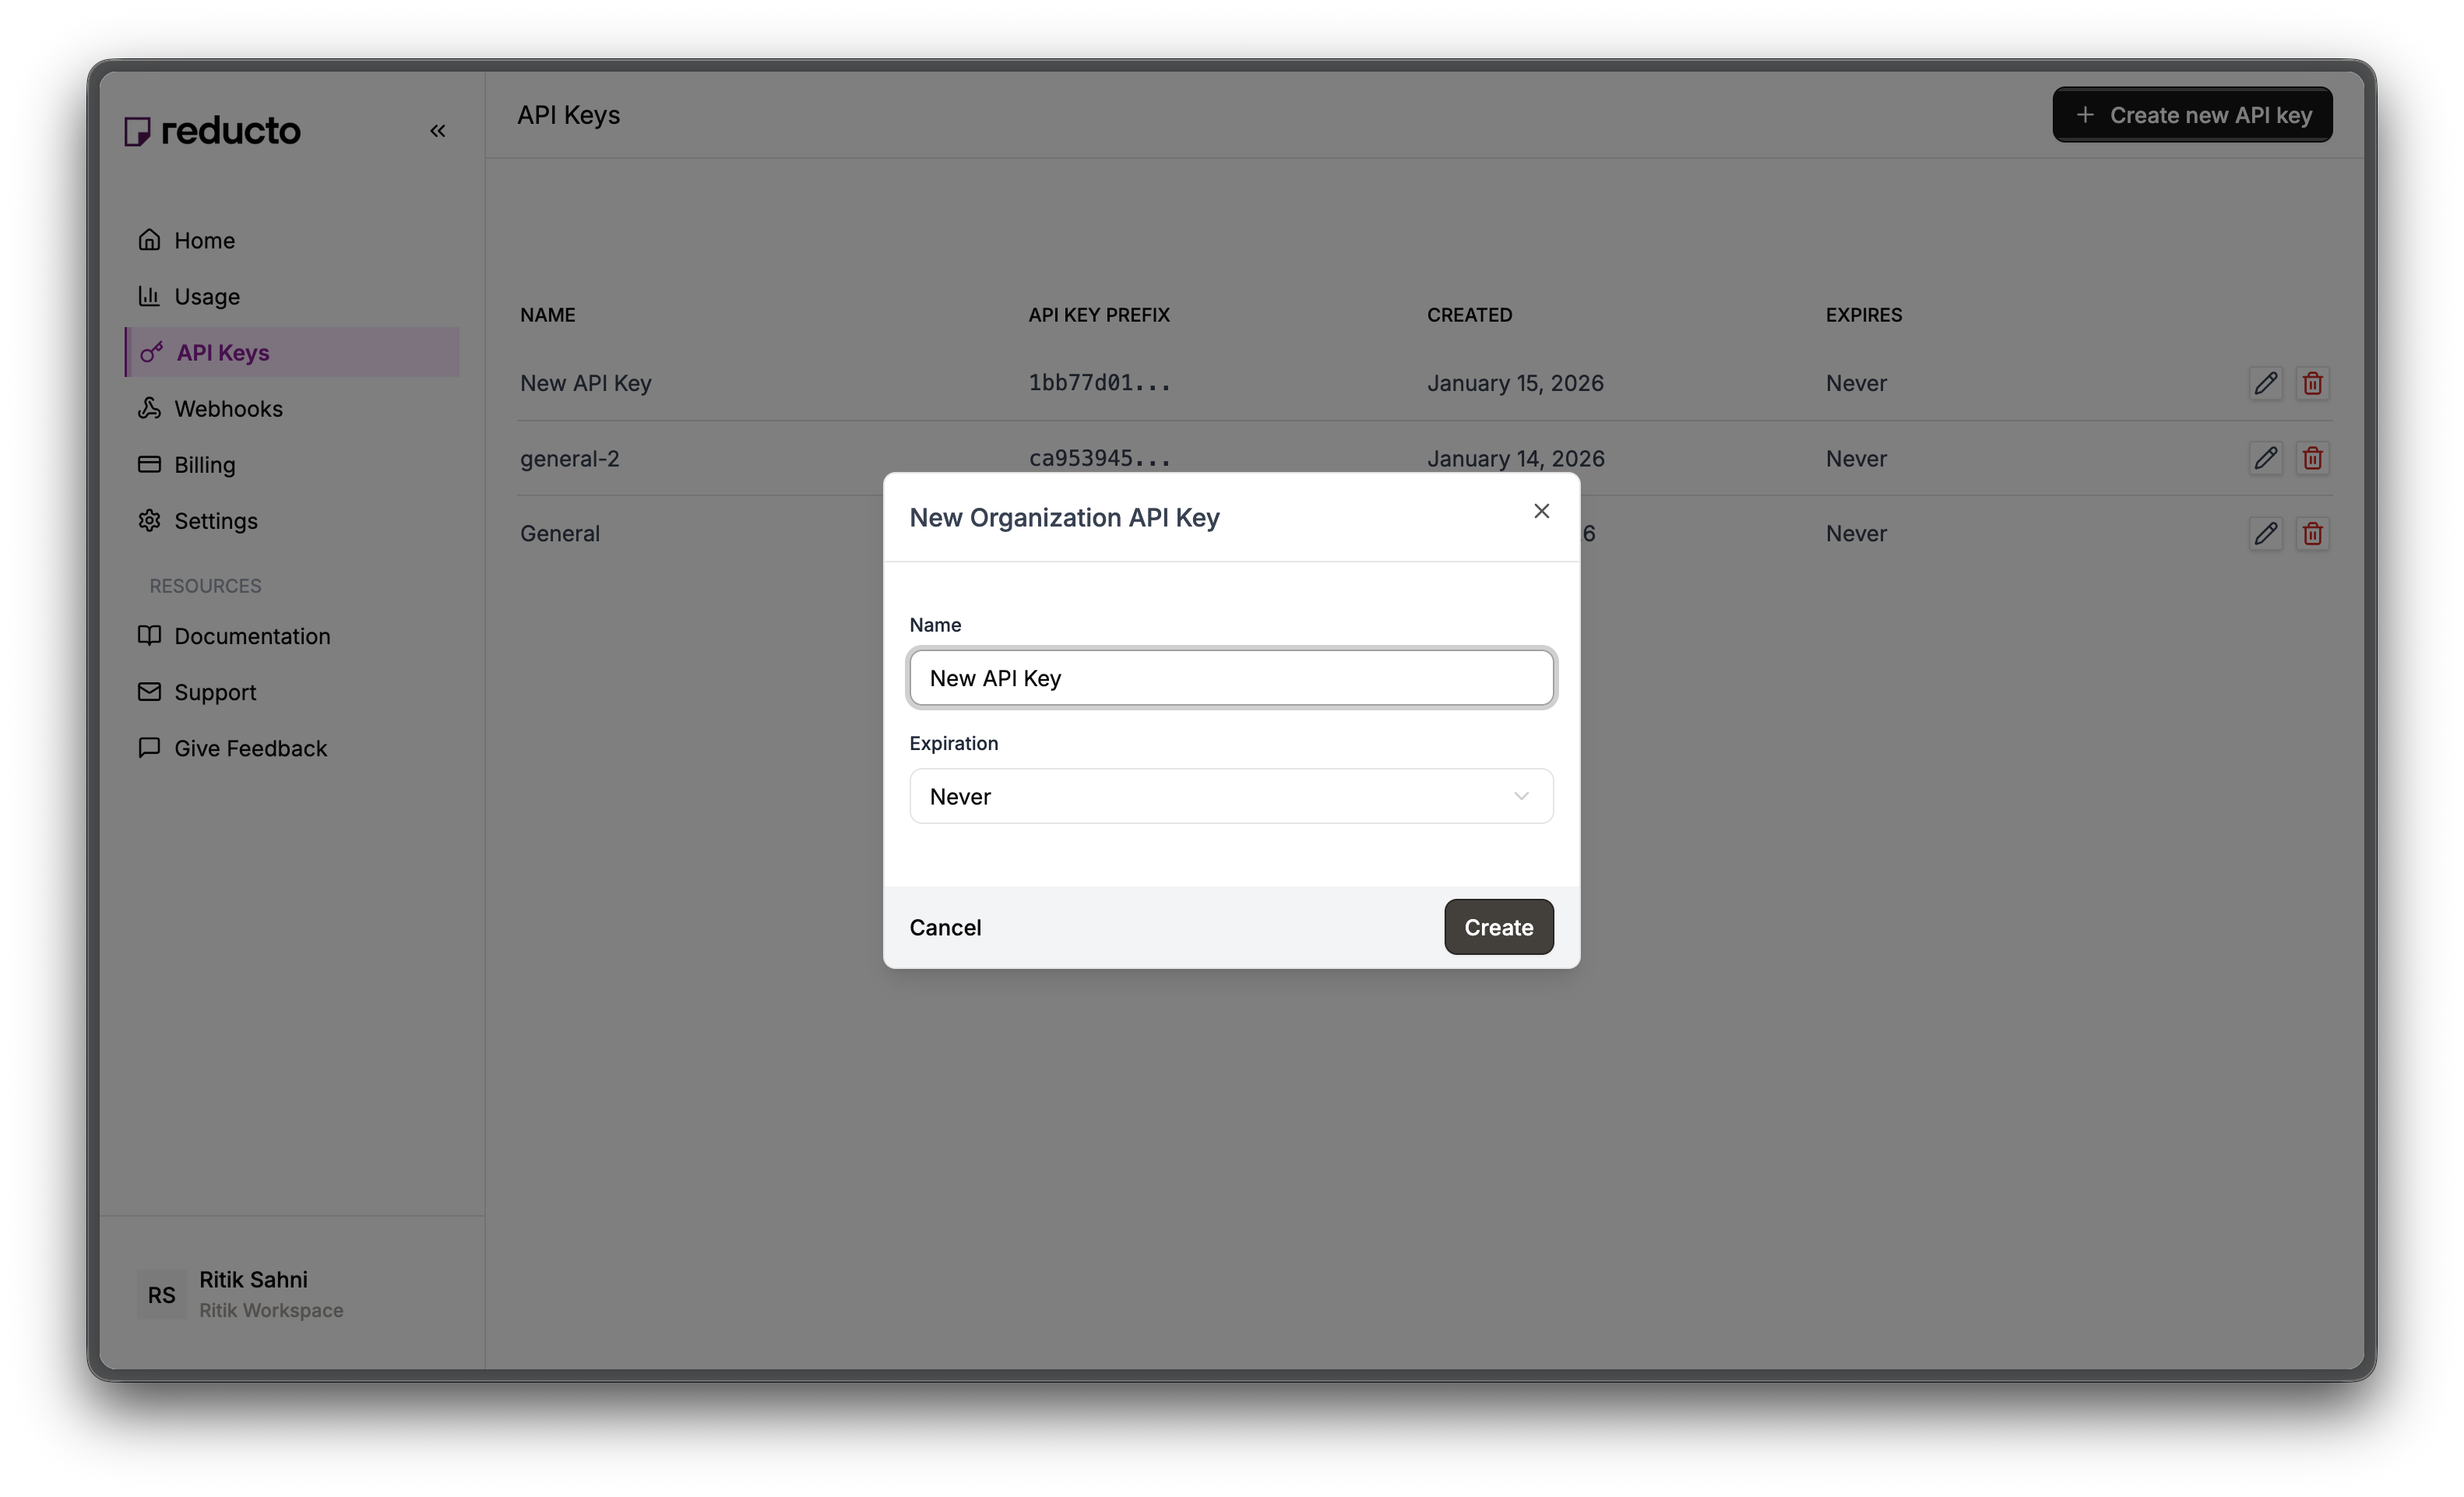
4
Copy Your Key
Copy your new API key and store it securely. You won’t be able to see it again after closing this dialog.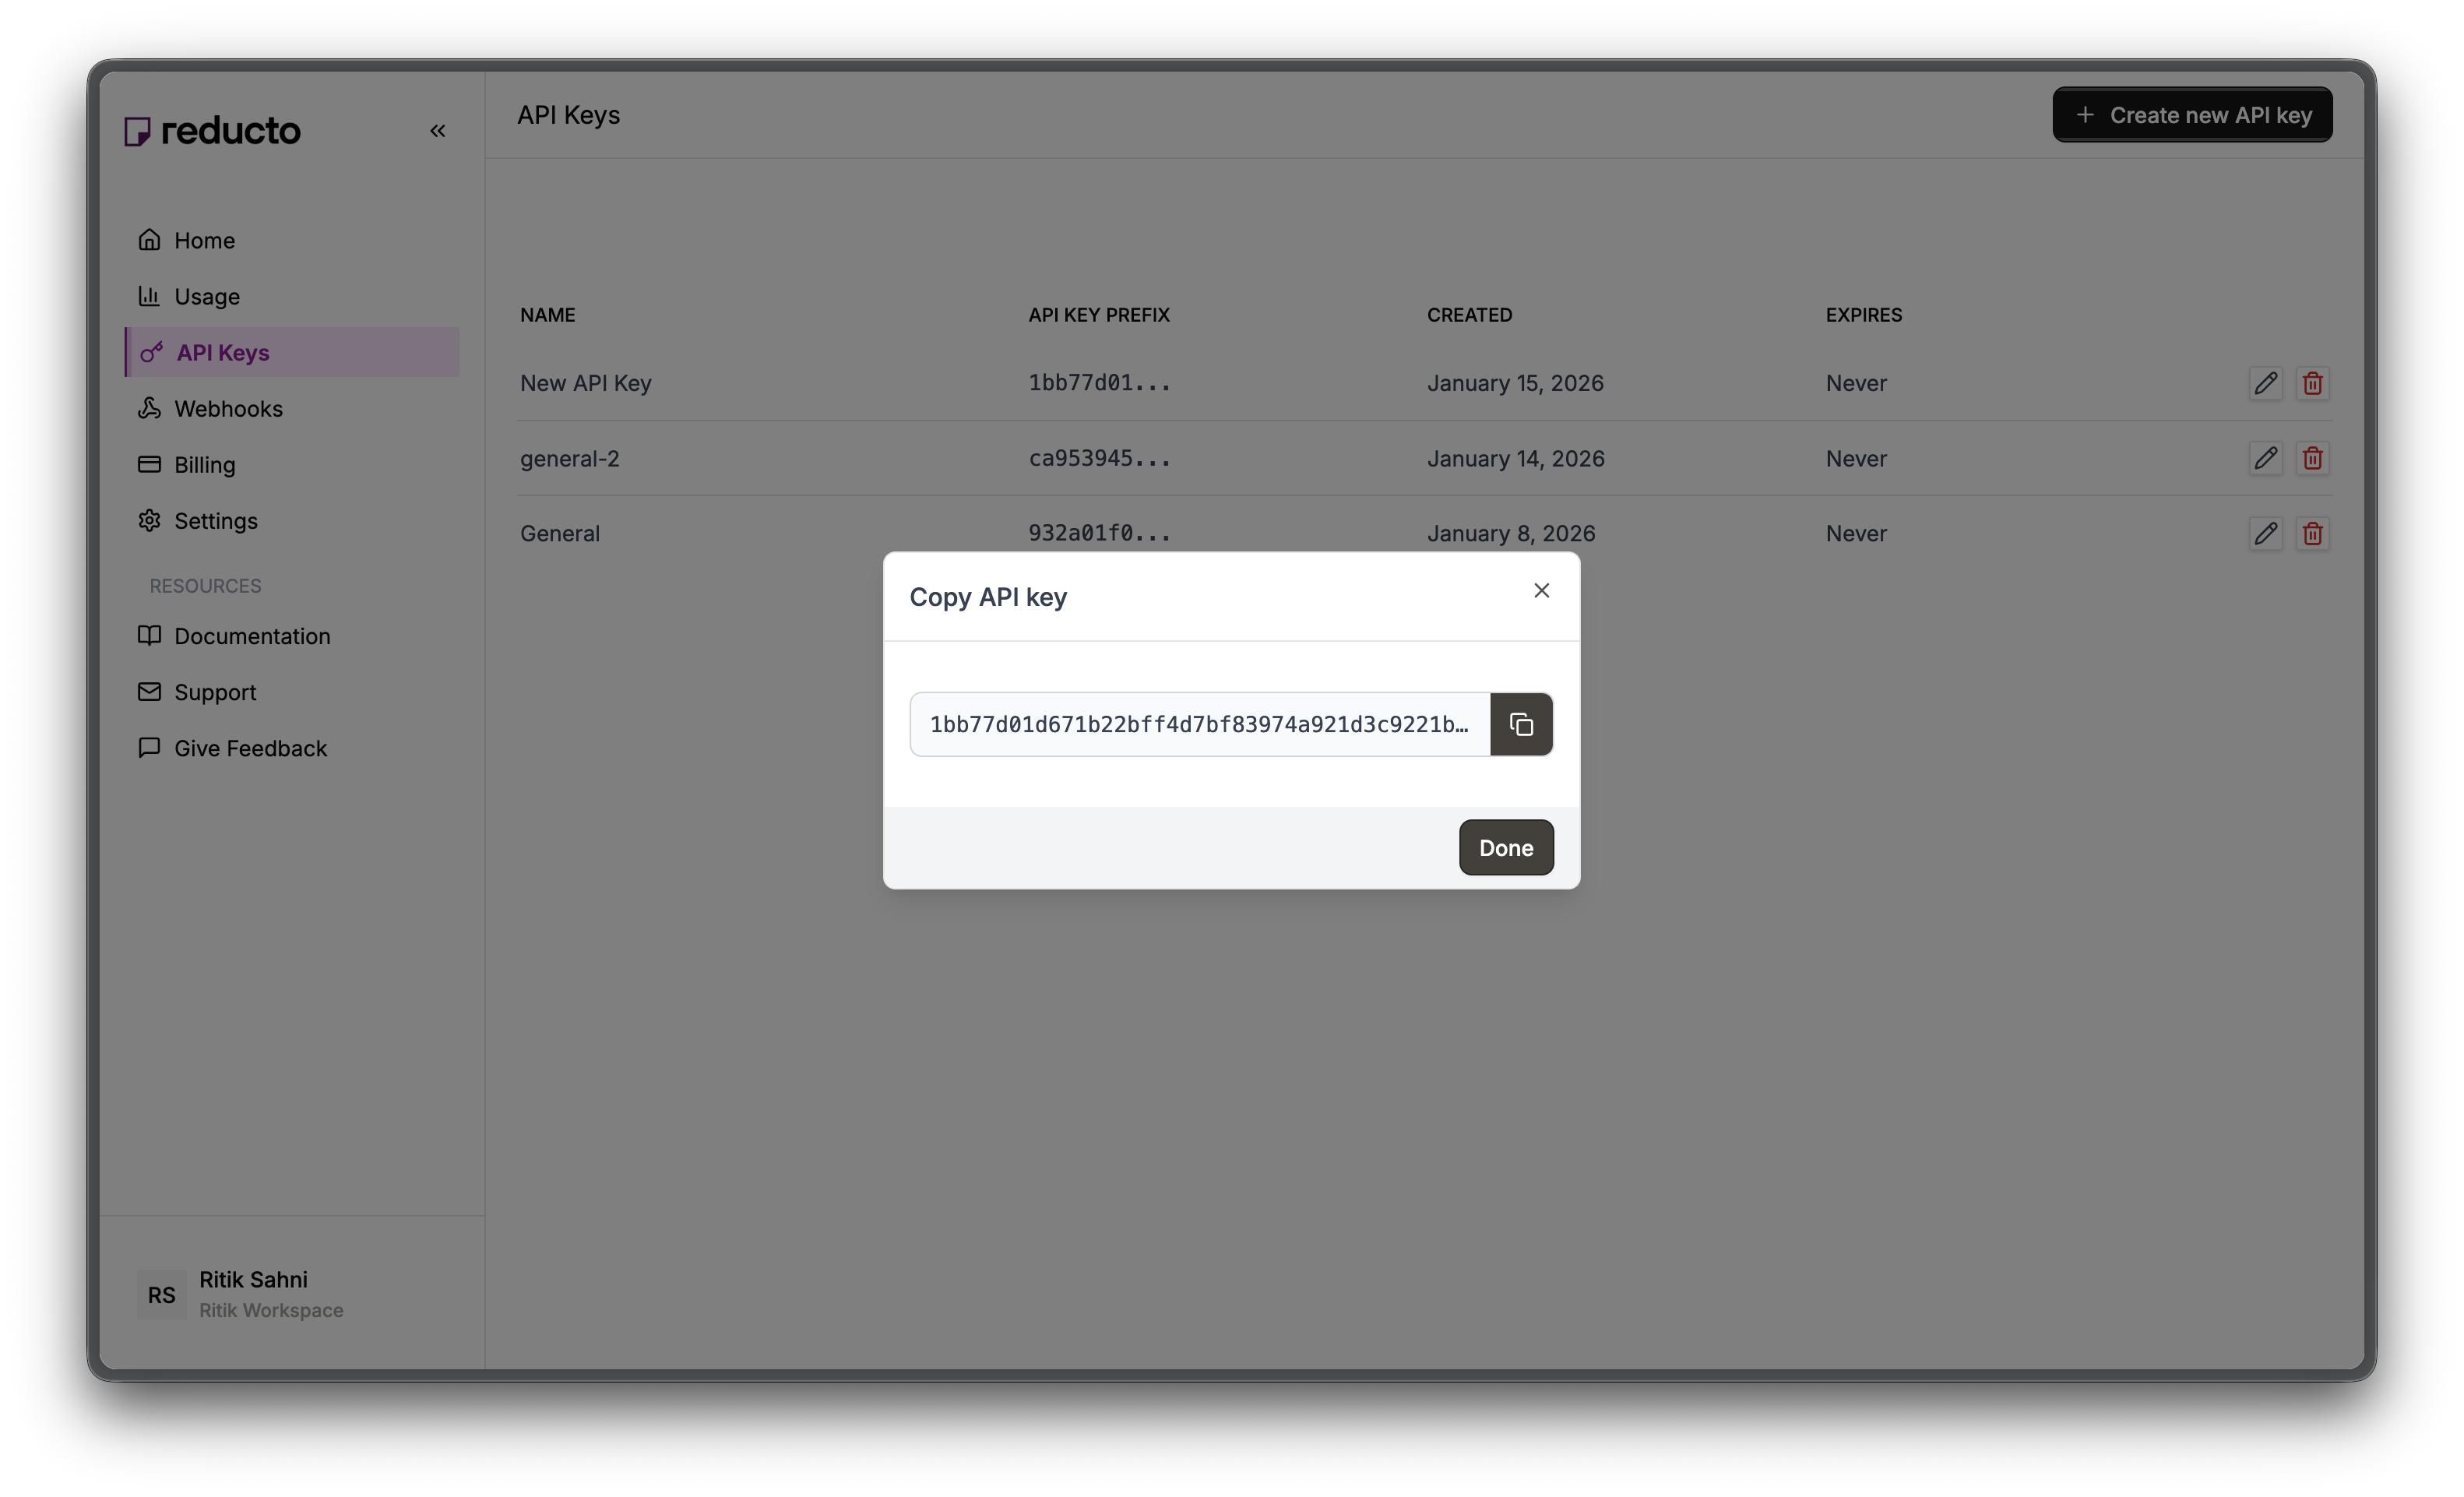
Prerequisites
You’ll also need accounts and API keys from these services:
You’ll also need a vision-capable LLM (Claude, GPT-4V, Gemini, etc.) for the final generation step.
Install the required packages:
Setup: AWS S3 bucket
Reducto image URLs expire after 1 hour, so upload extracted images to your own S3 bucket for durable storage. Keep the bucket private. When an image needs to be read, your application mints a short-lived presigned URL.1
Create an IAM user
Never use your AWS root account for applications. Instead, create a dedicated IAM user with limited permissions.Go to IAM Console → Users → Create user.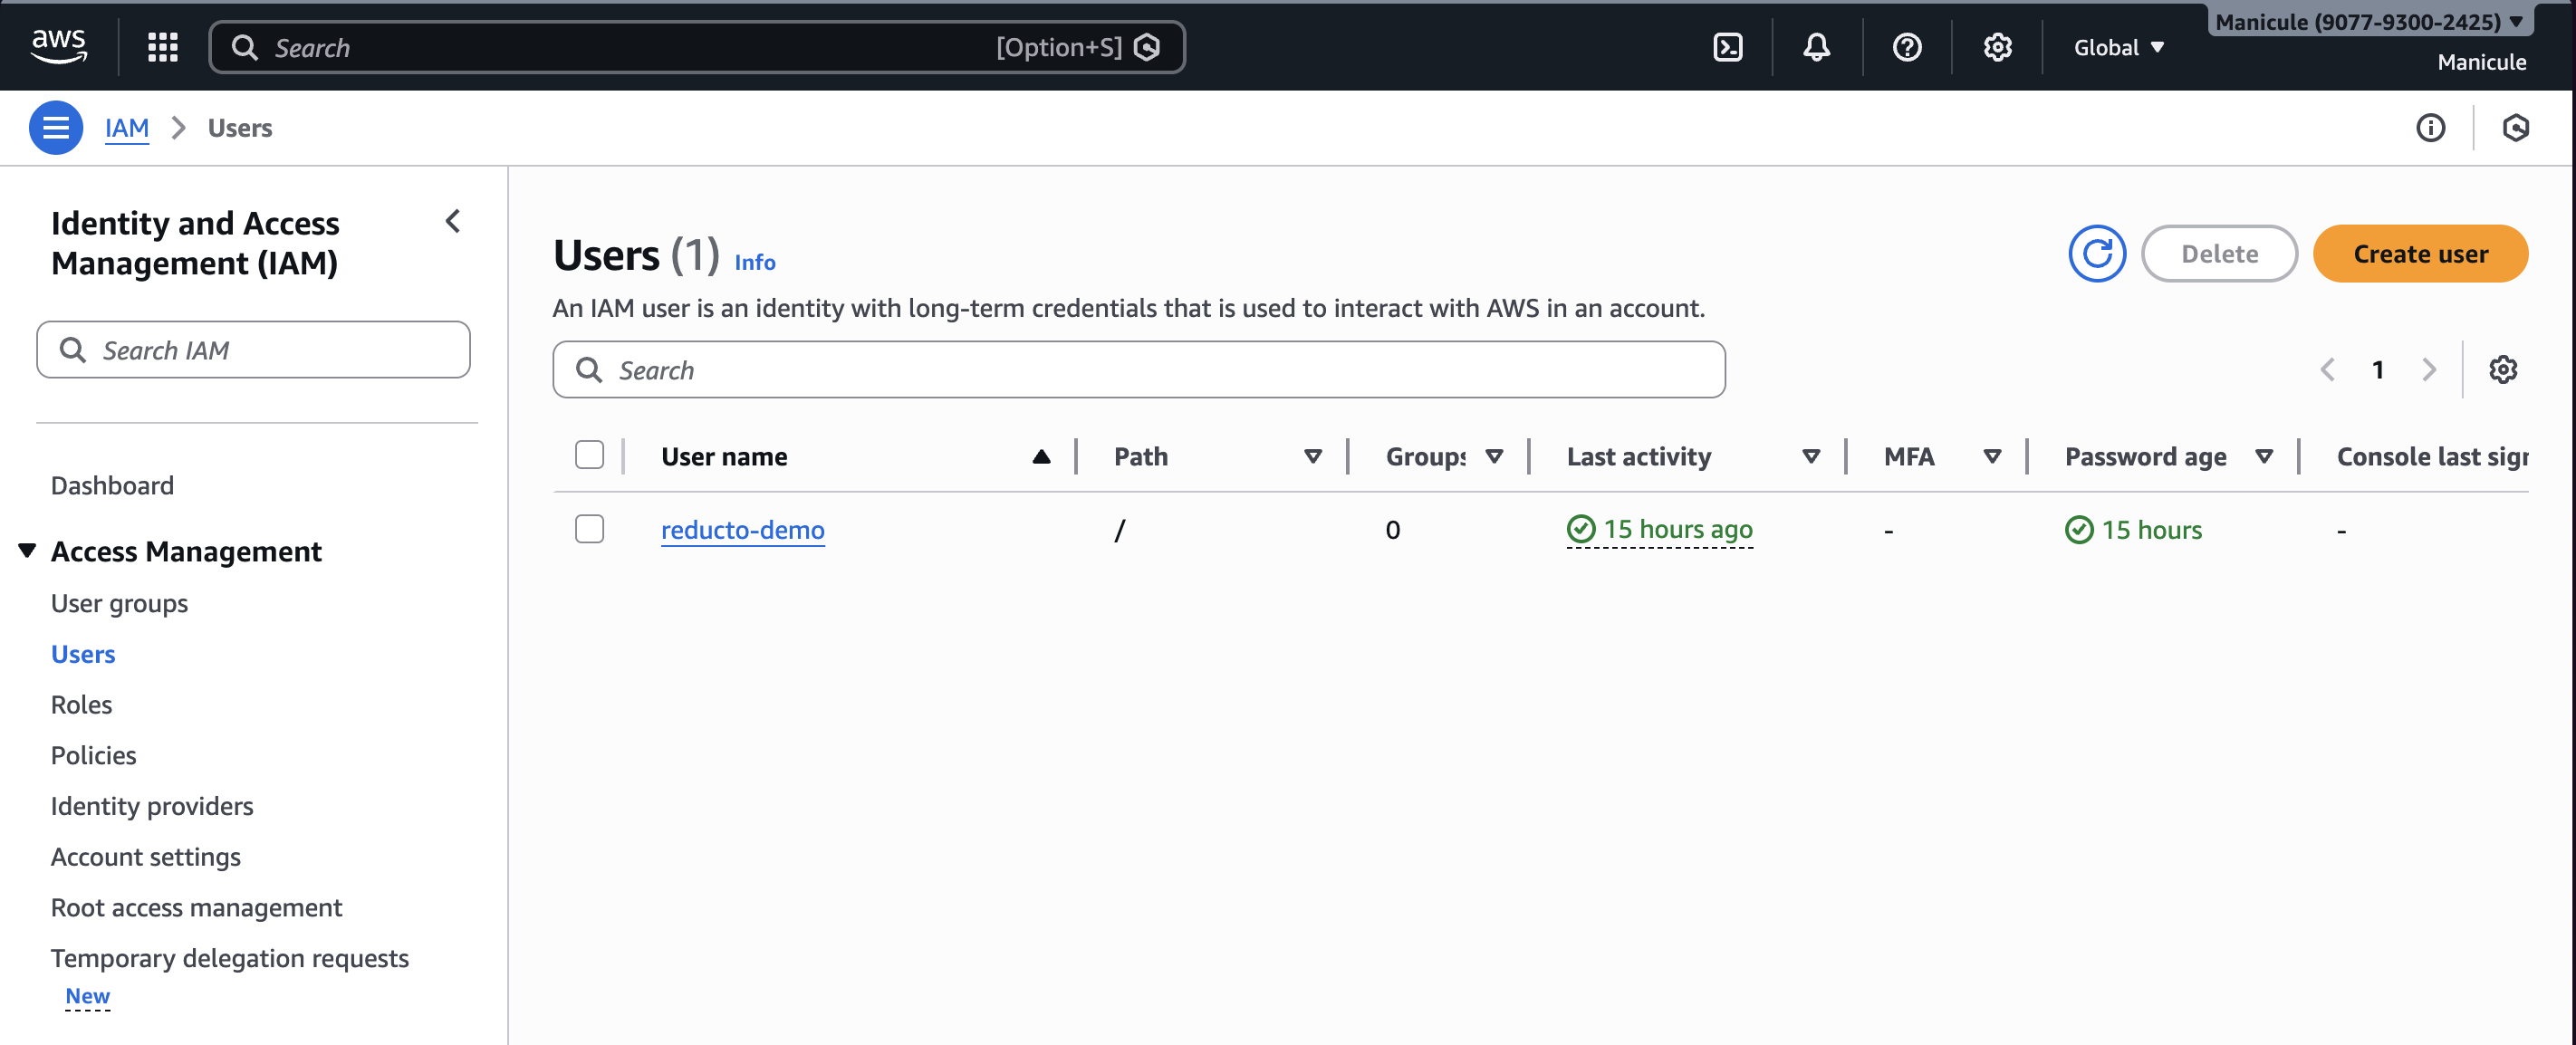
2
Attach least-privilege S3 permissions
Select Attach policies directly → Create policy, switch to the JSON editor, and paste a policy that grants access only to your bucket’s Replace
multimodal-rag/ prefix:YOUR-BUCKET-NAME with the bucket name you plan to use in the next step. Click Next, name the policy (e.g., multimodal-rag-s3), and click Create policy. Back in the user wizard, refresh the policy list, select the policy you just created, then click Next → Create user.When the pipeline runs on AWS, such as EC2, ECS, or Lambda, use an IAM role or other temporary credentials instead of long-lived access keys. Use access keys for local development only. See AWS IAM best practices.3
Create access keys
Click on your new user → Security credentials → Create access key.Select “Command Line Interface (CLI)”, confirm, and create.Save both keys now - you won’t see the secret again. You’ll need these for the
AWS_ACCESS_KEY_ID and AWS_SECRET_ACCESS_KEY environment variables.4
Create an S3 bucket
Go to S3 Console → Create bucket.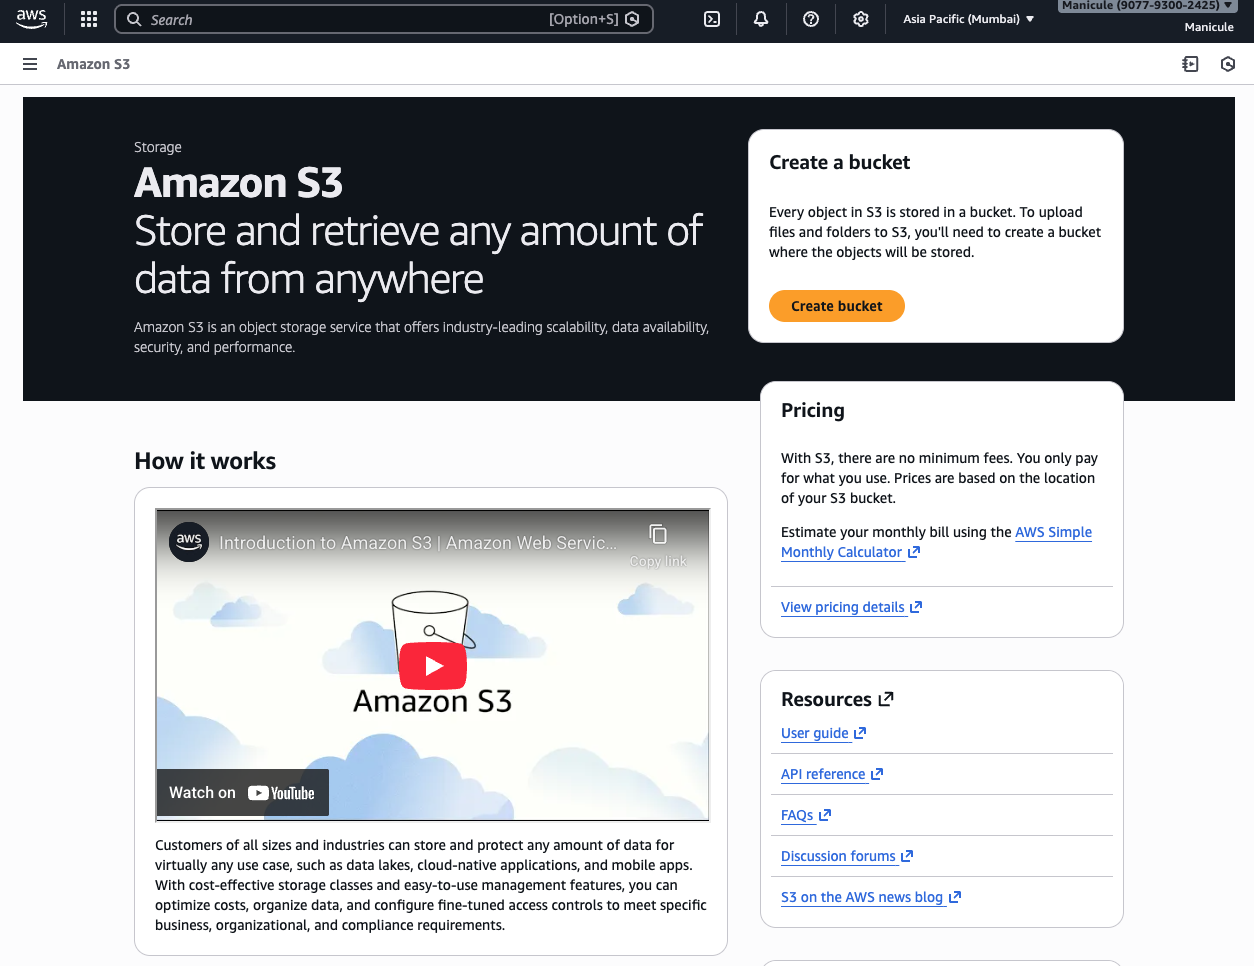
my-multimodal-rag-images) and select a region close to you for lower latency.5
Keep public access blocked
Leave S3 Block Public Access enabled, which is the default, and do not add a bucket policy. Your application reads objects through presigned URLs created with its IAM permissions. See S3 Block Public Access.
Setup: Pinecone index
We need a vector index to store text embeddings. Each vector will also include the S3 bucket and object key, so we can mint a presigned URL when we need the corresponding image.1
Create index
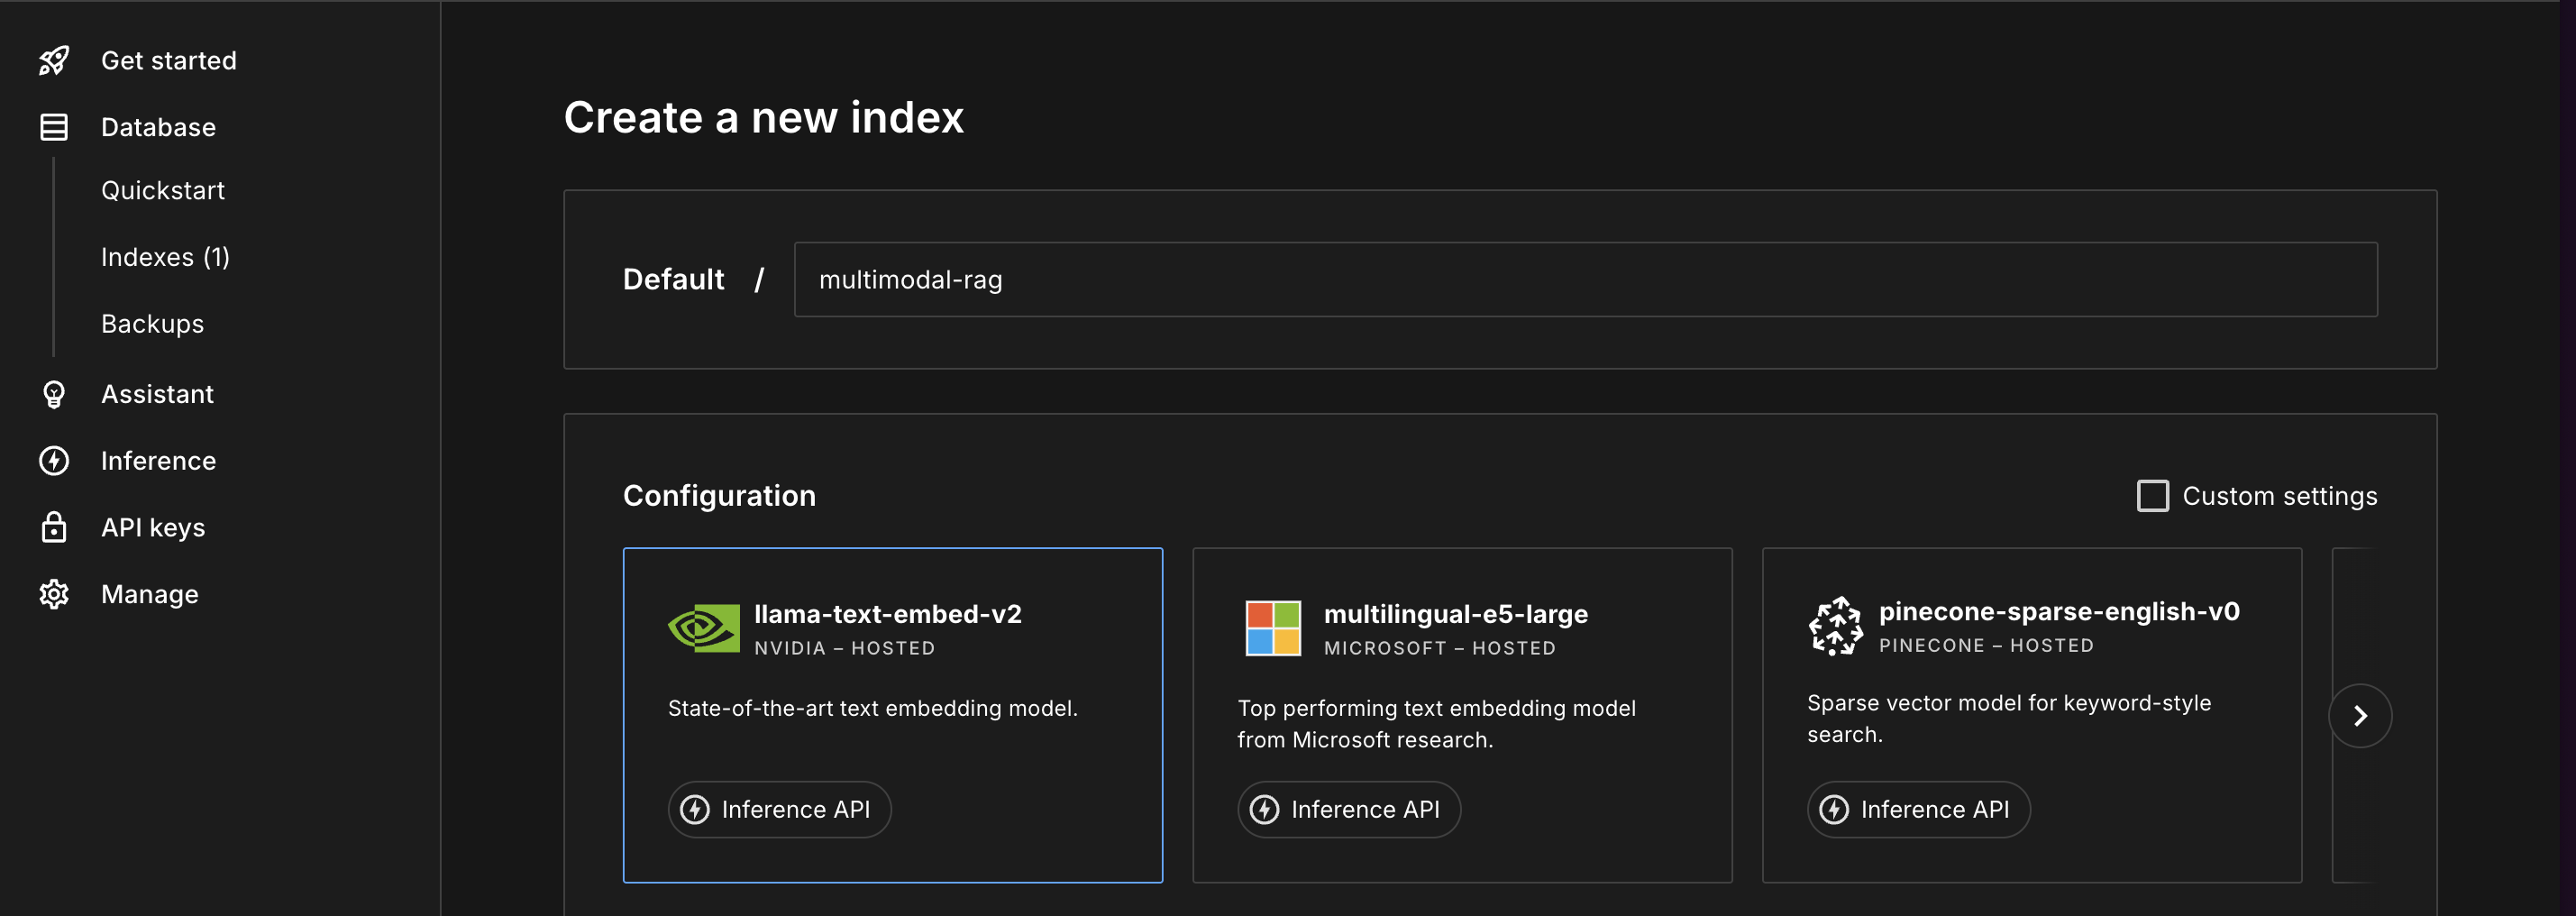
- Name:
multimodal-rag - Dimensions:
1024(the default dimension for VoyageAI’svoyage-4model) - Metric:
cosine
voyage-4 model defaults to 1024 dimensions. If you use a different embedding model, check its output dimensions.Set environment variables
Before running any code, set these environment variables in your terminal:Sample document
For this cookbook, we’ll use Deng et al.’s 2024 PLOS ONE paper, “Visual scanning patterns of a talking face when evaluating phonetic information in a native and non-native language.” The paper has 24 pages, 8 figures, and 6 tables, making it suitable for demonstrating multimodal RAG.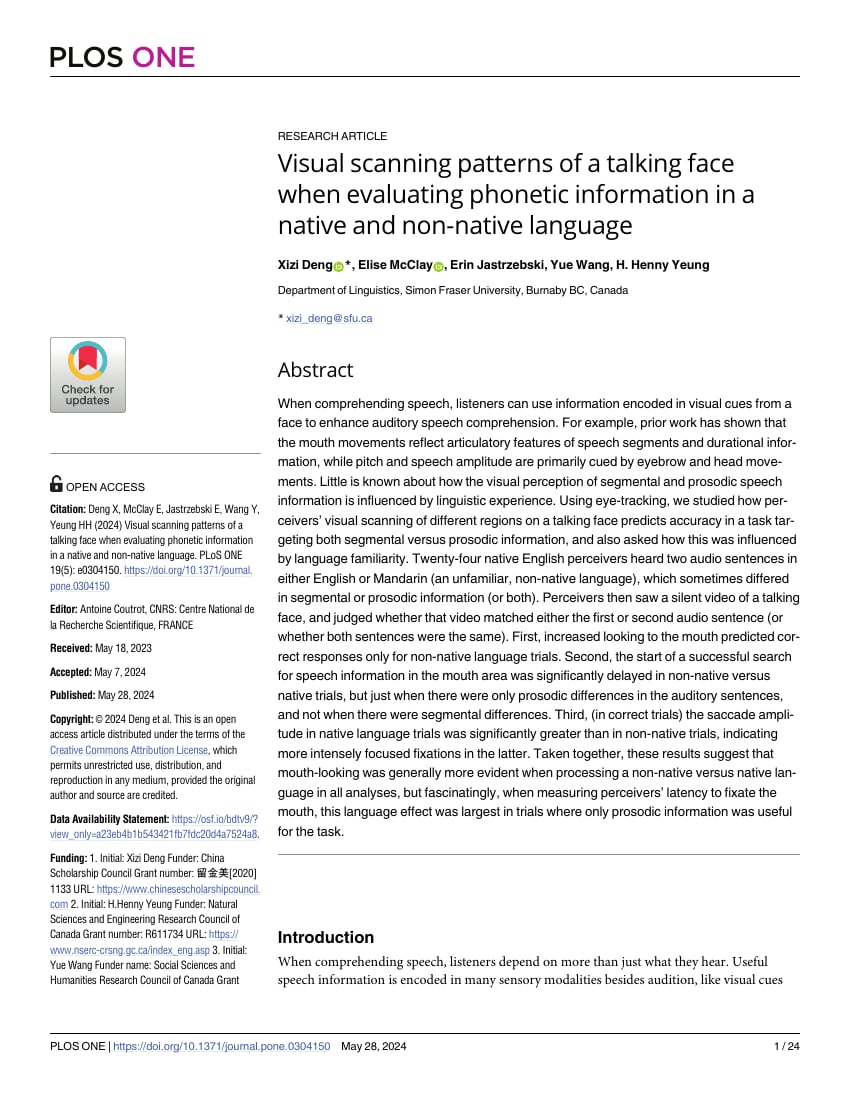
research-paper.pdf in your working directory.
Attribution: Deng, Xizi, Elise McClay, Erin Jastrzebski, Yue Wang, and H. Henny Yeung. PLOS ONE, 2024. Licensed under CC BY 4.0.
Step 1: Parse the document with image extraction
Initialize the client
First, we create a Reducto client using our API key:Upload the document
Before parsing, we need to upload the file to Reducto’s servers. Theupload() method returns a file ID that we’ll use in the parse call:
Parse with image extraction
Now we parse the document. The key settings here are:return_images: Tells Reducto to crop and return images for figures and tableschunk_mode: Controls how text is grouped into chunks
chunk_mode: "section"?
We use section-based chunking because it keeps figures together with their surrounding explanatory text. If a figure appears in the “Results” section, the chunk will include both the figure and the text that explains it. This improves retrieval quality because the embedding captures the full context.
Other options:
page: One chunk per page. Simpler but may split related content.variable: Adaptive chunking based on content density.
Step 2: Understand the response structure
Before we start uploading images, let’s look at what Reducto actually returns. This helps us understand what data we’re working with.Exploring chunks and blocks
Each chunk contains multiple blocks. A block can be text, a figure, a table, or other content types:Finding figures and tables
Let’s find all figures and tables in the document:Examining a figure block
Each figure block has several important fields:The
content field contains Reducto’s AI-generated description of the figure. This is incredibly useful, as it means your vector search can find figures based on what they show, not just the surrounding text.Step 3: Upload images to S3
Now we need to save these images permanently. Reducto’s URLs expire in 1 hour, so we’ll upload each image to S3 immediately.Initialize the S3 client
Create the upload function
This function downloads an image from Reducto and uploads it to S3. It returns the private object key, not a public URL.Upload all images
Now we loop through all chunks. For each chunk, we check if it contains any figures or tables. If it does, we upload those images to S3 and store the object key. If it doesn’t, we still index the chunk without image metadata. This is the key difference from image-only indexing: we index everything, both text-only chunks and chunks with figures.Verify an image is accessible
Use the S3 API to verify that the object exists in your private bucket:Step 4: Index into Pinecone
With images safely stored in S3, we can now create vector embeddings and store them in Pinecone.Initialize the clients
Understanding what we’re indexing
For each chunk, we store:- Vector: Embedding of the text (from
chunk.embed) - Metadata: Text preview, page number, and optionally the S3 bucket and object key
Create embeddings and upsert
- For embeddings (
[:8000]): VoyageAI has input token limits - For metadata (
[:1000]): Pinecone has metadata size limits (~40KB per vector)
VoyageAI’s free tier has rate limits (3 requests per minute). For production use with many documents, add rate limiting or upgrade your plan.
Step 5: Query and retrieve
Now we can search our index. When someone asks a question, we:- Embed their query using the same model (
voyage-4) - Find the most similar vectors in Pinecone
- Return the matches with their S3 object keys
Create the search function
Test the search
Step 6: Send to your LLM
You now have everything needed for multimodal generation:- Text context:
match.metadata["text"] - Images: Mint a presigned S3 GET URL from
match.metadata["s3_bucket"]andmatch.metadata["s3_key"], or fetch the raw image bytes.
Reducto features for better results
These Reducto settings can improve your multimodal RAG pipeline:Figure summaries (enabled by default)
Figure summaries (enabled by default)
Reducto automatically generates AI descriptions of figures and includes them in the
embed field. This is why queries like “show me the revenue chart” can find relevant figures even if “revenue” doesn’t appear in surrounding text.This is controlled by summarize_figures (default: True). Keep it enabled for multimodal RAG.Agentic figure extraction
Agentic figure extraction
For documents with complex charts, enable agentic figure extraction for higher accuracy:This uses vision LLMs to better understand chart content. It adds latency and cost but improves extraction quality.
Embedding-optimized output
Embedding-optimized output
Enable
embedding_optimized for output specifically tuned for vector embeddings:Filter block types
Filter block types
If you only want certain content types, use
filter_blocks to exclude others from the embed field:Best practices
Choose the right chunking strategy
Choose the right chunking strategy
The
chunk_mode setting affects how figures relate to surrounding text:section: Groups content by document sections. Best for structured documents like research papers.page: One chunk per page. Simple and predictable.variable: Adaptive chunking based on content density.
section usually works best because it keeps figures with their explanatory text.Use the embed field for vector search
Use the embed field for vector search
Always use
chunk.embed (not chunk.content) for your vector embeddings. The embed field includes AI-generated figure descriptions that make visual content searchable.Not every query needs images
Not every query needs images
Sending images to your LLM adds latency and cost. Consider routing:
- Simple factual questions → Text-only RAG
- Questions about trends, comparisons, or visuals → Multimodal RAG
has_images in retrieved chunks before deciding which path to take.Handle rate limits gracefully
Handle rate limits gracefully
VoyageAI’s free tier has a 3 requests per minute limit. For production:
- Batch multiple texts in a single embedding call
- Add delays between calls
- Upgrade to a paid plan for higher limits
Limit retrieved images
Limit retrieved images
More images means higher LLM costs and slower responses. For most questions, 2-3 images is sufficient. Use
top_k=3 in your search function.Complete example
Here’s the full pipeline in a single script:Next steps
Batch Processing
Process multiple documents in parallel.
Chunking Methods
Learn about different chunking strategies.
Chart Extraction
Configure image extraction and other parse options.
Response Format
Understand the full parse response structure.